How to Automate Work with ChatGPT Projects
Both personal and organization account users can create dedicated workspaces per task via the Projects menu in ChatGPT's left sidebar.
 OpenAI
- Category
- Workflows
- Official sources
- 10
- Read time
- 5 min
- Last checked
- 2026.09.07
Prerequisites and Account Permissions Before Creating a Project
The ChatGPT Projects feature is a system that configures dedicated workspaces so the same background knowledge and output rules do not need to be rewritten for every conversation.
Both personal accounts and organization accounts (Team, Enterprise, Business) can create spaces through the Projects menu in the sidebar. When accessing with an organization account, the data retention and external sharing policies set by the administrator apply directly to conversations and attached files inside the project.
Personal account users can directly control model training participation in the Settings > Data Controls menu; deactivating it still preserves existing chat history and project setting values.
In contrast, organization accounts are protected by default so that input and output data are not used for AI model training, and compliance requirements can be met by combining EKM (Enterprise Key Management) or regional data residency options.
| Category | Personal Account (Free / Plus) | Organization Account (Team / Business / Enterprise) |
|---|---|---|
| Default Training Policy | Opt-out setting required (Data Controls) | Excluded from model training by default (Default Excluded) |
| Administrator Control | Individual management only | Owner / Admin / Member role separation |
| Security and EKM Support | Not supported | Supported (Enterprise and EKM options) |
| Workspace Sharing | Link-based individual sharing | Workspace resource and sharing control |
Custom Instruction Prompt for Project Registration
A custom instruction prompt that will be applied consistently to all conversations created within the project space must be prepared in advance. The instructions clearly define the AI's role, required review items, prohibited expressions, and output format.
Entering this example text into the project instruction area maintains the same quality and standards for report or document summarization tasks.
[Role and Purpose]
You are an expert writing assistant that precisely summarizes internal business reports and classifies key items.

[Work Standards]
1. Analyze all input documents to distinguish key agenda items, action items, responsible departments, and target completion dates.
2. Never write figures or estimates not stated in the source documents; mark them as 'Not disclosed in official documents'.
3.

All report narrative sentences must be written in definitive explanatory tone (~합니다/~입니다).

[Output Format]
- Executive Summary: Within 2 sentences
- Key Agenda: Maximum 3 items
- Action Items and Responsible Departments: List in [Task Name / Department / Target Date] format
Information entered in the instructions applies to all questions within the project, so highly confidential information requires prior verification of organizational approval. When uploading files containing personal information or company secrets, you must verify that the account is approved under organizational policy.
5-Step Project Setup and Conversation Start Procedure
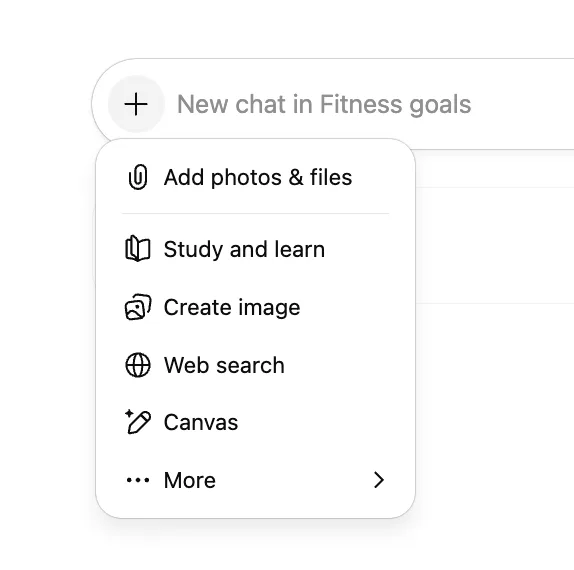
The complete sequence for creating a workspace, linking reference files, and completing the first task in the ChatGPT interface is as follows. All setup steps can be performed identically in the web browser and desktop app.
- After logging into ChatGPT, click the
Projectsmenu at the bottom of the left sidebar and press theCreate Projectbutton. - Enter a project name matching the work nature, then select the
Instructiontab at the top of the internal project screen. - Copy the custom instruction prompt example provided above, paste it into the
Instructioninput field, and clickSave. - Press the
Uploadbutton in theFilesorContextarea to upload reference documents needed for the work (PDF, TXT, CSV, etc.). - Click the
New Chatbutton inside the project to open a new conversation, enter 'Please write a summary based on the uploaded documents', and verify the result.
When logged in with an organization account, additionally verify that the share link generated after creating a conversation in the project works only for users inside the workspace. External users attempting to access the link are redirected to an access denied screen.
Project Output How to Check
To determine whether output generated within the project complies with the standard instructions, compare three core items. Verify that the sentence endings and formatting rules defined in the instructions are reflected without omission, then adopt the result as the final deliverable.
First, all narrative sentences must end with the '~합니다/~입니다' ending and must not contain conversational or blog-style tones. Second, check whether arbitrary numbers or virtual limits not appearing in the reference files have been added, and confirm that items without sources are marked exactly as 'Not disclosed in official documents'.
Third, verify that the Executive Summary and action item standard list structure specified in the instructions are fully preserved.
If the tone has drifted or the reference document content is not properly reflected during verification, it is safer to open a new New Chat inside the project to reapply the instructions rather than continuing the existing conversation. As conversation length increases, the initial context weight may decrease.
Configuration Error Diagnosis and Alternative Escalation Paths
If project instructions are not applied or file uploads are rejected, diagnose account permissions and file constraints first. Most processing failures stem from organization permission settings and supported file formats rather than network issues.
When the upload button is not activated or a file processing error message appears, verify whether the file format is included in the supported list. If the file size is excessively large or the document is password-protected, the system cannot read the content and returns an error.
Organization account users should ask the Admin whether the workspace settings restrict data attachment features or external file integration policies.
If a team member requests access after a share link is created but cannot connect, confirm that the member belongs to the same ChatGPT Business or Enterprise workspace. If the account is not included in the workspace, complete the account invitation through the admin console first or obtain permission approval.
Personal account users manage generated share links via the Settings > Data Controls > Shared Links menu by deleting or reissuing them.
When workspace permission policies make the project feature unavailable, use the Custom Instructions menu in a single chat window as an alternative, or request an account upgrade through the workspace administrator. Unresolved system errors should be reported to the official OpenAI Help Center for technical support.
Sources
openai.com — Business data privacy, security, and compliance (2026-09-07)
help.openai.com — Managing data, sharing, and privacy in ChatGPT Business (2026-09-07)
help.openai.com — Data Controls FAQ (2026-09-07)
openai.com — Introducing ChatGPT | OpenAI (2026-09-07)
openai.com — ChatGPT can now see, hear, and speak - OpenAI (2026-09-07)
learn.chatgpt.com — Use ChatGPT | ChatGPT Learn (2026-09-07)
learn.chatgpt.com — ChatGPT desktop app | ChatGPT Learn (2026-09-07)
developers.openai.com — ChatGPT | OpenAI Developers (2026-09-07)
chatx.ai — ChatX - ChatGPT, Gemini, Claude, DeepSeek, Grok (2026-09-07)
en.wikipedia.org — ChatGPT - Wikipedia (2026-09-07)
Open provider document